Usage
Batch Image Conversion
In GIMP, select File → Batch Convert....
A dialog appears that allows you to add input files and folders and adjust export settings, such as the output folder, filenames and the file extension.
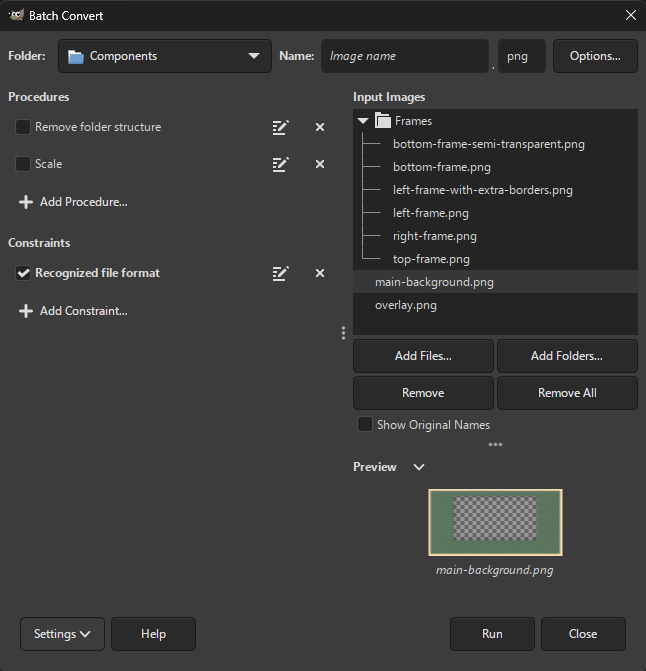
To start batch conversion, press the Run button.
For information on the export settings, see Adjusting Export Settings below. Image names are used as filenames by default.
For information on actions and conditions, see Actions and Conditions below.
You can add files and folders in one of the following ways:
- Drag and drop images and folders from a file explorer application to the area under
Input Images. - Copy and paste images and folders from a file explorer application to the area under
Input Images. Note that you must click on the area first. - Copy and paste images and folders from a text file, each on a separate line to the area under
Input Images. Note that you must click on the area first. Any files and folders that do not exist are ignored. - Press the
+button to add files or folders.
Files with a file extension not recognized by Batcher will be filtered by default. If you use a third-party file load plug-in, uncheck the Recognized File Format condition.
You will be warned if you add folder(s) containing too many files or e.g. an entire drive. This is a safeguard against accidentally adding an undesired folder.
You can remove input images and folders by selecting them and pressing Delete or by pressing - → Remove Selected. You can clear the entire input list by pressing - → Remove All or selecting everything with Ctrl + A and then pressing Delete.
You can adjust import options for each file format detected in the input list by pressing the arrow button and selecting Import Options....
By default, the renamed images (as they would be named on export) are displayed. To show their original names, press the arrow button and check Show Original Names.
You can move around individual files or folders by dragging and dropping them anywhere within the input list, or by pressing Alt + Up/Down. This is useful if, for example, you intend rename the images with a numbered sequence.
Files and folders can be sorted by several criteria: original name, new name, creation date, modification date and file size. By default, sorting is performed in the ascending order, folders are always placed first and name-based sorting is case-sensitive. All these options can be switched off/on as needed.
You can export images to the same parent folders as the added input files/folders using the Match input folders option in the output folder dropdown.
You will be warned when selecting this option as you may inadvertently overwrite the original images (when the filenames and file extensions match).
You can view message logs recorded during processing via Settings → View Logs and save them to a file.
Exporting Layers
Open an image in GIMP and select File → Export Layers....
A dialog appears that allows you to adjust export settings, such as the output folder, filenames and the file extension.
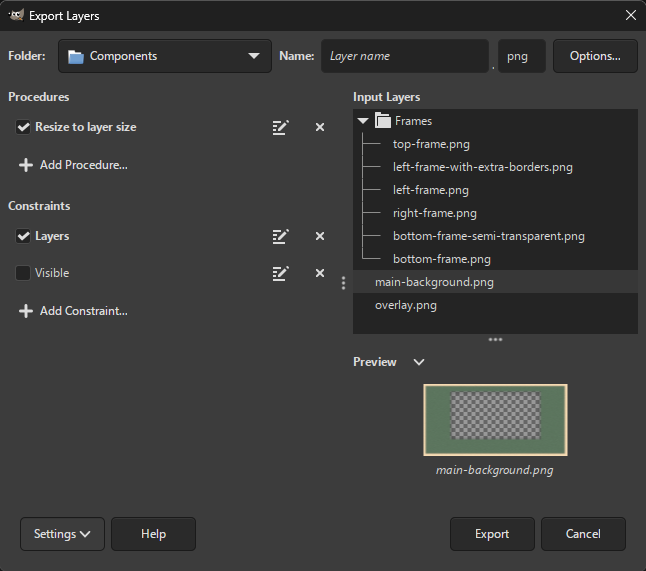
To export layers, press the Export button.
For information on the export settings, see Adjusting Export Settings. For information on actions and conditions, see Actions and Conditions below.
Quick Export of Layers
If you made changes to your image, and you want to export again with the same settings, or you need a simple export without customization, you can run File → Export Layers (Quick).
For the first time, a small dialog with only export settings is displayed, where you can adjust the basic export settings.
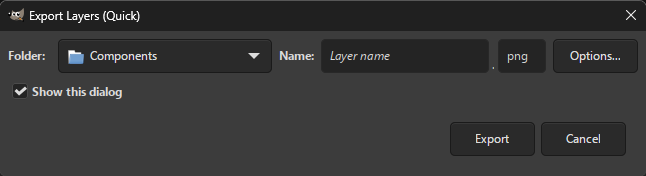
This dialog can be skipped by unchecking Show this dialog.
Note that even actions and conditions set up in the Export Layers dialog will be applied for Export Layers (Quick), even if they are not shown.
Quick Export of Selected Layers
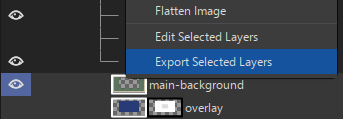
When you select multiple layers in GIMP, you can right-click and select Export Selected Layers to quickly export the selected layers.
In this case, any conditions set in the main dialog will be ignored.
Editing Layers
Open an image in GIMP and select File → Edit Layers....
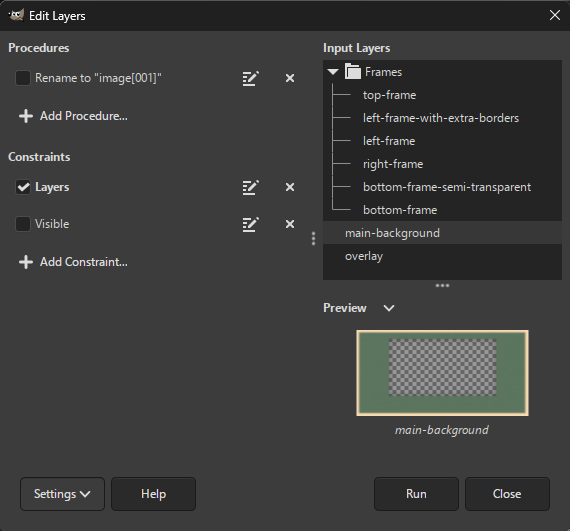
To run batch editing, press the Run button.
This will apply actions to each layer satisfying the activated conditions.
You can take a look at a few examples to get started with actions and conditions.
If the Layers condition is unchecked, group layers will also be processed.
Quick Layer Editing
You can quickly run batch editing via File → Edit Layers (Quick).
This can be useful if you made changes to your image and you want to run batch editing again with the same settings.
Quick Editing of Selected Layers
When you select multiple layers in GIMP, you can right-click and select Edit Selected Layers to quickly edit the selected layers.
In this case, any conditions set in the main dialog will be ignored.

Exporting Images Opened in GIMP
If you have multiple images opened in GIMP, you can use File → Export Images... to export them to the specified file format.
A dialog appears that allows you to adjust export settings, such as the output folder, filenames and the file extension.
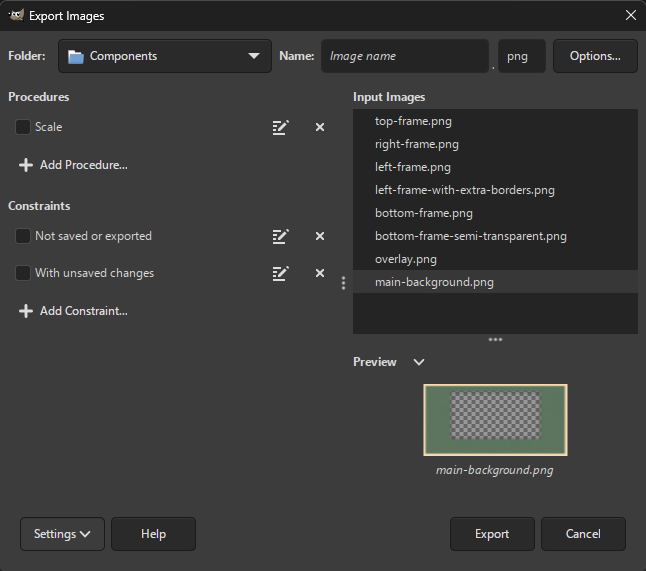
To export images, press the Export button.
Note that this feature exports images to another file format. If you intend to batch-save XCF images in their original locations, use File → Edit and Save Images... instead.
For information on the export settings, see Adjusting Export Settings. For information on actions and conditions, see Actions and Conditions below.
Quick Export of Images
If you made changes to your images, and you want to export them again with the same settings, or you need a simple export without customization, you can run File → Export Images (Quick).
For the first time, a small dialog with only export settings is displayed, where you can adjust the basic export settings.
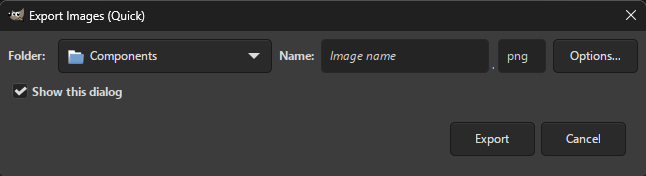
This dialog can be skipped by unchecking Show this dialog.
Note that even actions and conditions set up in the Export Images dialog will be applied for Export Images (Quick), even if they are not shown.
Editing and Saving Images Opened in GIMP
File → Edit and Save Images... allows you to batch-edit and save all opened images in place.
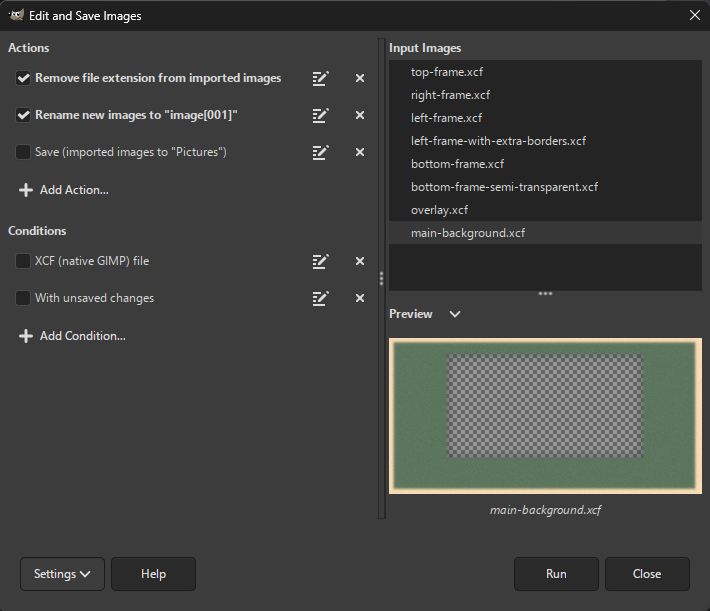
Both editing and saving are optional, i.e. you can perform only saving, or only editing as needed. If you intend to edit images, you can take a look at a few examples to get started with actions and conditions.
To edit and/or save images, press the Run button.
If you intend to batch-export images to another file format, use File → Export Images... instead.
If you intend to edit each layer within an image individually instead of images as a whole, use File → Edit Layers... instead.
Quick Image Editing and Saving
You can quickly run batch editing and saving of images via File → Edit and Save Images (Quick).
This can be useful if you e.g. made changes to your images and you want to save them all with the same settings.
Adjusting Export Settings
Filename Pattern
The text entry next to Filename lets you customize filenames. A popup offers you several components you can combine to create a filename pattern, such as a numbered sequence.
For details, see Renaming.
File Format
Type or choose your desired file extension next to File Format.
The dropdown list displays available file formats alongside their associated file extensions. If a file format contains multiple file extensions, the first is selected by default, but you may also choose a different extension (by clicking on it or pressing Tab).
For now, the dropdown only contains a fixed list of file formats provided by GIMP. However, you can still enter a file extension not in the list in case you use a third-party file export plug-in.
Export Options
Pressing the Export Options... button reveals additional export options, particularly file format options (compression for PNG, image quality for JPG, etc.).
If you need to adjust options for a file format not recognized by Batcher, set How to adjust file format options to Interactively.
You will be prompted to set the file format options right after you start batch processing.
All options are described in Export Options.
Actions and Conditions
Before the start of batch processing, you can apply a multitude of actions to each image/layer, such as scaling, background insertion, any layer effect or GIMP plug-in.
You can exclude images/layers from being processed/exported based on one or more conditions (only filenames matching a suffix, only visible layers, …).
Actions and conditions can be a powerful way to adjust batch processing to your heart’s content. You can take a look at a few examples to get started.
The names under Input Images/Input Layers and the image preview are automatically updated as you adjust the actions and conditions.
For details, see Actions and Conditions.
Preview
The image preview displays the contents of the selected image/layer.
You can adjust the width of the entire pane containing the input list and the preview by dragging the separator between the preview and the actions/conditions. You can also adjust the height of the previewed image by dragging the separator above the image.
If the previewed image takes too long to render, the preview is no longer updated automatically.
A refresh button above the image is displayed that allows you to manually update the image.
To switch between automatic and manual update, press the arrow button and select Update Automatically.
Note that the preview is only an approximation of what the exported image will look like. For example, for the JPEG format, which does not support transparency and may result in visible compression artifacts, the preview will show a transparent image without artifacts.
Managing Settings
You can turn auto-closing the main dialog on/off by checking/unchecking Settings → Close when Done.
You can check Settings → Continue on Error to continue processing if you determine that error(s) occurring during processing are harmless.
Once batch processing is done successfully, your settings (output folder, file extension, dialog size, actions, conditions, etc.) are automatically saved.
You can save settings manually anytime by selecting Settings → Save Settings or pressing Ctrl + S anywhere in the dialog.
To reset settings to their default values, select Settings → Reset Settings.
You may also save settings to a custom file by selecting Settings → Save Settings to File....
This allows swapping between different plug-in configurations or sharing them.
To load settings from a file, select Settings → Load Settings from File... and select the file.
For Batch Convert, you can optionally turn off saving input images by unchecking Settings → Keep Input Images. When this setting is checked, Reset Settings will not remove the input images. When loading settings from a file and this setting is checked, the input images will be preserved and any input images stored in the file will be ignored. If you want to load the input images from the file, uncheck this setting.